Using my Barrel and crate, i'm going to show you how to convert your geometry accordingly to then give them a basic texture.
So i was given 200 tris to play with to make a barrel and a crate, i also had the limitation of using one 512x512 (pixels) texture sheet for the both.
i made a fairly simple barrel, and a fairly simple crate, however the crate took a little more thinking.
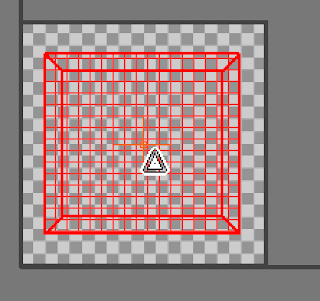
i made a quick 8 sided cylinder with 2 segments running around the cylinder horizontally.
This is what it looks like.
What comes next!??!?!!
well i have to convert the geometry into an "Editable (not Edible) poly.
Have your shape selected, then right click, when the little menu appears find the option convert to ( right at the bottom)
< In this menu is where you will find editable poly, you click it and you've officially converted it.
using the modifier menu ( the little window that looks like a square with a blue shaded rainbow in)
you will find that you can use the edge face and vertex options. For my barrel im going to use the edges.
select top and bottom edges none of the vertical ones and scale them together evenly
No further detail should be needed. ( to make a realistic barrel i suggest you use a higher poly method and the tool inset, which i used on my crate.
So make a box and convert it to an editable poly.
Select all the faces and find the button inset located in edit polygons
click the little box next to the word inset and
Make sure the icon with the 4 squares on with the arrow says by polygon and not by group. when you hover over the one below it 2 arrows pop up simply slide it to the right and you should have extra polygons making your crate look more like a crate.
Apply changes with the green tick, and then extrude the selected polygons back on themselves to make a satisfying looking crate.
Now to make both the barrel and crate the same object.
Click off of the face pannel but keep the current object selected. Find the option attach
Click the barrel and you're done presto they're all the same object.
(At this point you can also group, but this doesn't attach it simply makes both objects move as one)
now they're one object you can unwrap
go to
> modifier list
> Unwrap UVW
> Face
open UV Editor
Select them all and drag them away from the box, this box is where your end product goes
As you see all the selected in the uv editor have also selected all the geometry on your actual objects.
Selecting just the crate and moving it has taken it away from the barrel thus letting you unwrap them one at a time.
TA DA!
now just to use planar and cylinder.
using
the 5 faces that where facing towards me and the ones on the opposing sides then quick planaring them to get this. ( scale and place in the box)
Cylindrical
select all the faces on the barrel and find this button in the modifier area called projection.
CYLINDRICAL ... Click it and then simply click back off of it.
you get an enlarged version of this grid, scale it down and add it to your uvw template.
when you're done go to tools in the UV editor and click
you should get another pop up box change the spec's to 512x512 or whatever the specification you're using, save as a Jpeg.(image file will do)..etc
open in photo shop and draw all over it.
This is my texture map. saved as a PSD.
open 3dsmax and Right click on the Unwrap UVW option to collapse all and make the objects useable.
Click 'M' shortkey for material editor and click on the first empty sphere.
now add a standard diffuse map
click the box next to diffuse add a bitmap and find where you saved your photoshop texture.
once added the sphere should look like this.
Drag the material from the sphere onto your objects, they should go grey.
to see them you much click on the show standard map in viewport button.
finally you should end up with this!
This is my Barrel and crate eventually with my hand painted textures accompanying them.
My poly count was
so i think i did alright, alas i did not reach my 200 limit and i did my barrel and crate quite heartily as well.
Thank You again
Michelle.


